ROBOTICA Studio 1.4 – A More Interactive Experience
Tiago Carvalho
Apr 21, 2026
ROBOTICA Studio goes 1.4! 🚀
This release brings five new important features:
- Mesh decomposition for more complex physics interactions
- Introduction of the signal light and push button component
- New print instruction and numeric expressions
- General scene viewport improvements
- MQTT connectivity (experimental)
- Other minor improvements
Mesh decomposition
In physics-based simulation, colliders are what make interactions believable. They are the simplified “collision shapes” the engine uses to detect contact, friction, and constraints between objects, everything from a part resting on a table to mechanisms that must move in sync.
With ROBOTICA Studio 1.4, we’re introducing Mesh Decomposition: a new way to generate accurate, stable colliders even for complex CAD models. Instead of relying on a single, heavy collider, Studio can now automatically decompose a mesh into multiple convex hulls, producing a collision model that closely matches the original geometry, while remaining robust in a real-time physics environment.
Why this matters
Using the original mesh directly as a collider (often refered to as mesh collider) is very computationally expensive and can be unstable in interactive physics, especially with moving bodies, rotating parts, or many simultaneous contacts. Physics engines are typically optimized for convex collisions, which are faster and more reliable to solve. By converting complex geometry into a set of convex hulls, we get the best of both worlds: high-fidelity collisions with much better performance and stability, unlocking more demanding scenes and more realistic interactions.
Three quality modes: High, Medium, Low
Mesh decomposition is available in three configurations:
- High – best geometric accuracy (more convex hulls), ideal for tight tolerances and detailed interaction
- Medium – balanced option for most scenes
- Low – faster generation and lighter colliders, best for large scenes and objects that do not need high fidelity collisions.
Higher quality generally produces a closer match to the original model, but can increase computation time, specially during decomposition.
New button and signal light components
ROBOTICA Studio 1.4 introduces two new interaction components designed to make your simulations more versatile, more visual, and closer to real-world automation workflows:
- Signal Light
- Push Button
Together, they help you build simulations that don’t just move—they also communicate status and react to operator input, just like on the shop floor.
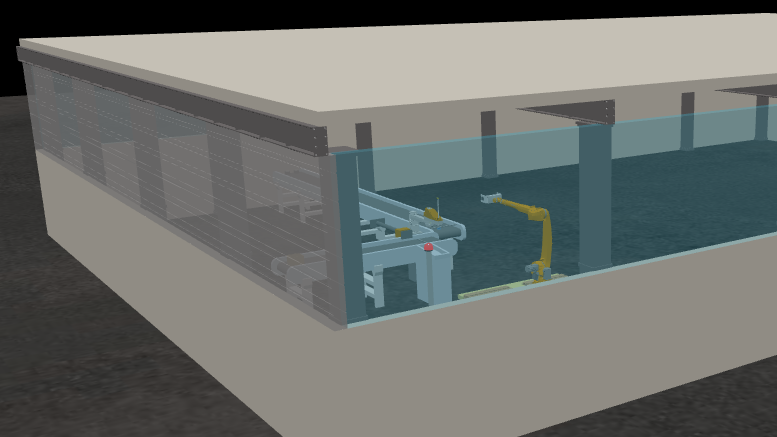
Signal Light
The Signal Light component lets you add a simple, industrial-style two-state indicator to your scene, commonly used to provide instant visual feedback on the status of machines, buffers, stations, or process phases.
Setup is straightforward:
- Define the Inactive color and the Active color
- Trigger the state change through your program logic/signals at runtime
This makes it easy to “animate” the state of your system and quickly understand what’s happening in the simulation without digging through variables or logs.
Push Button
The Push Button component adds real-time interactivity to your simulations by allowing users to press buttons during runtime and trigger actions instantly.
In industrial automation, buttons are everywhere—used to start/stop operations, confirm steps, reset faults, rearm systems, or even act as emergency controls (depending on the scenario). With this new component, Studio simulations can better mirror how operators and technicians interact with real equipment.
To configure a button, you only need:
- The push direction
- The push distance (to define the press animation)
Once set, you can connect the button to your logic so that pressing it triggers actions in real time—opening the door to more dynamic demos, operator-like interactions, and training-ready scenarios.
New Print instruction & Expressions
To make programming and debugging inside ROBOTICA Studio easier, version 1.4 introduces two improvements to the programming workflow: a new Print instruction and support for variable-based expressions.
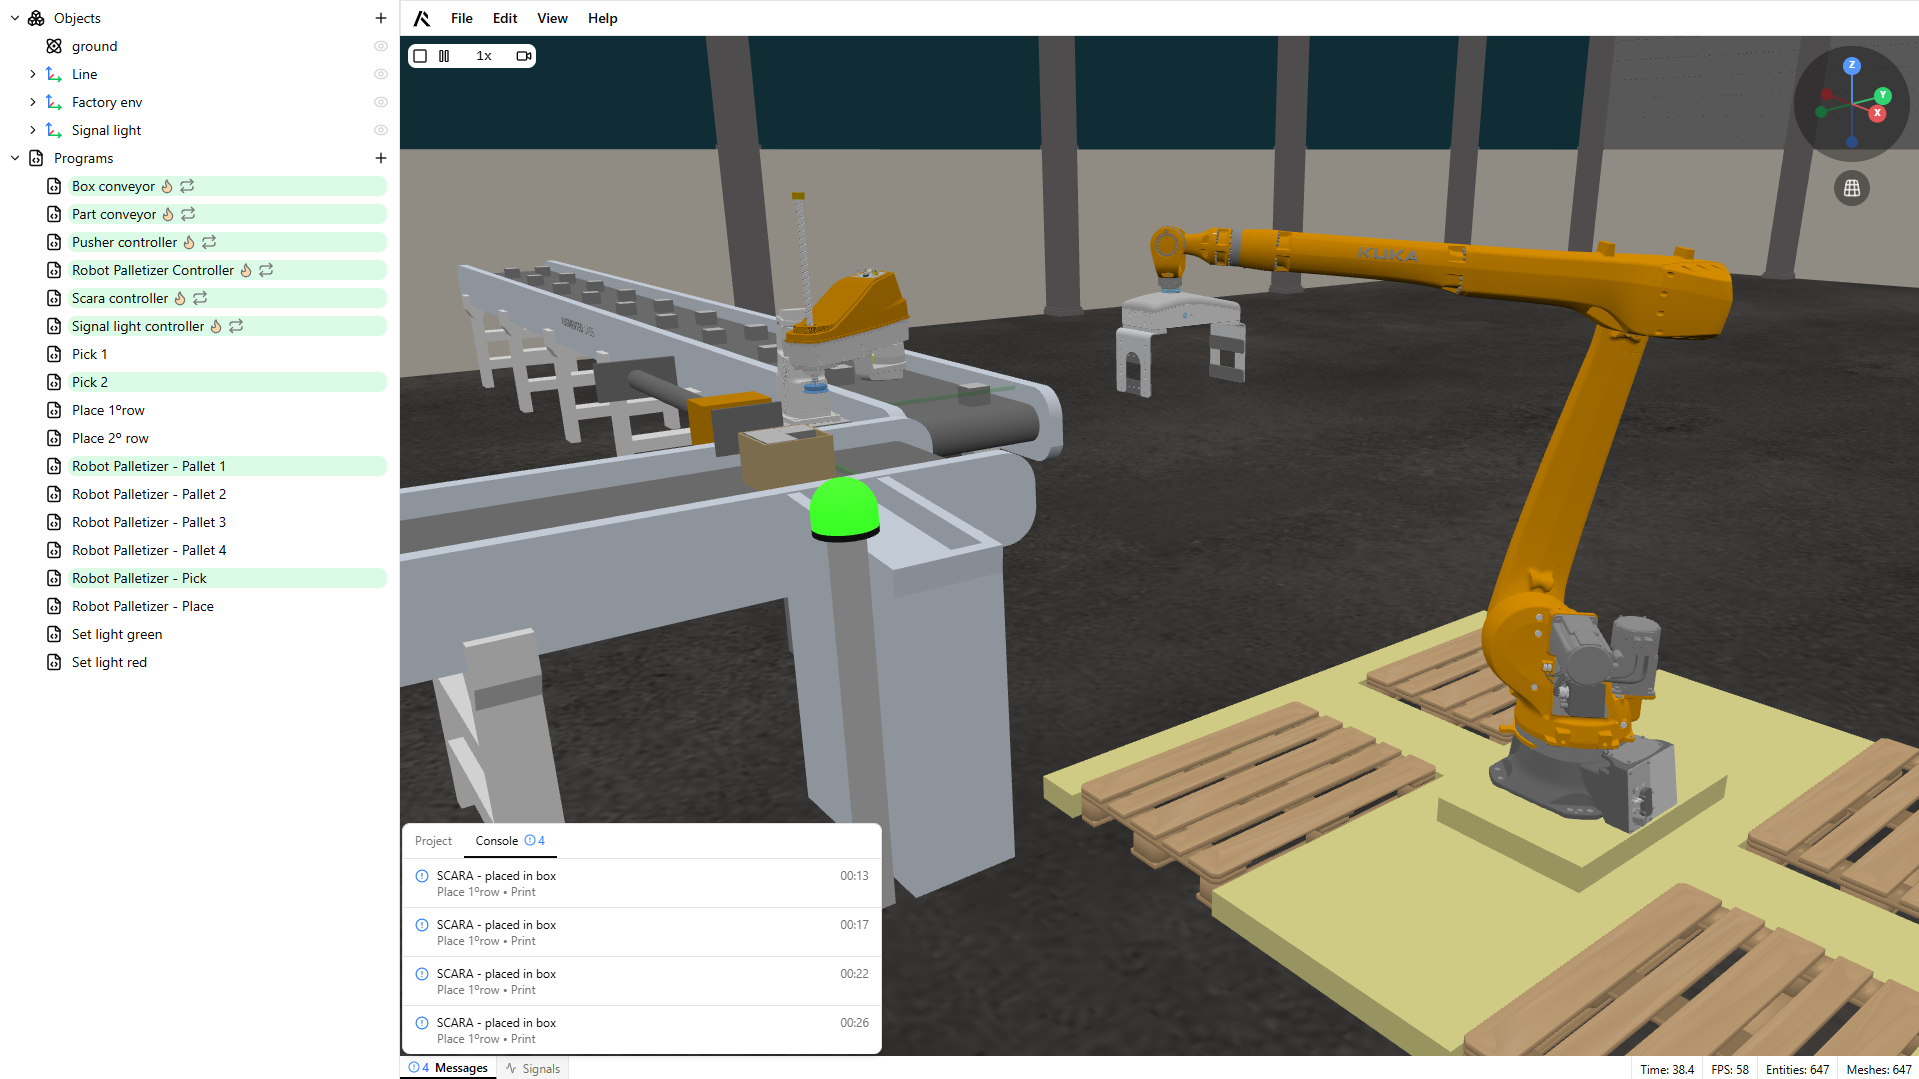
Print instruction
You can now print messages directly to ROBOTICA Studio’s console, which makes it much easier to:
- debug program logic,
- follow execution flow step-by-step,
- confirm that conditions, signals, and sequences are behaving as expected.
This is specially usefull for complex simulations where you need to debug and for logging exact event timings, like the moment a box is picked.
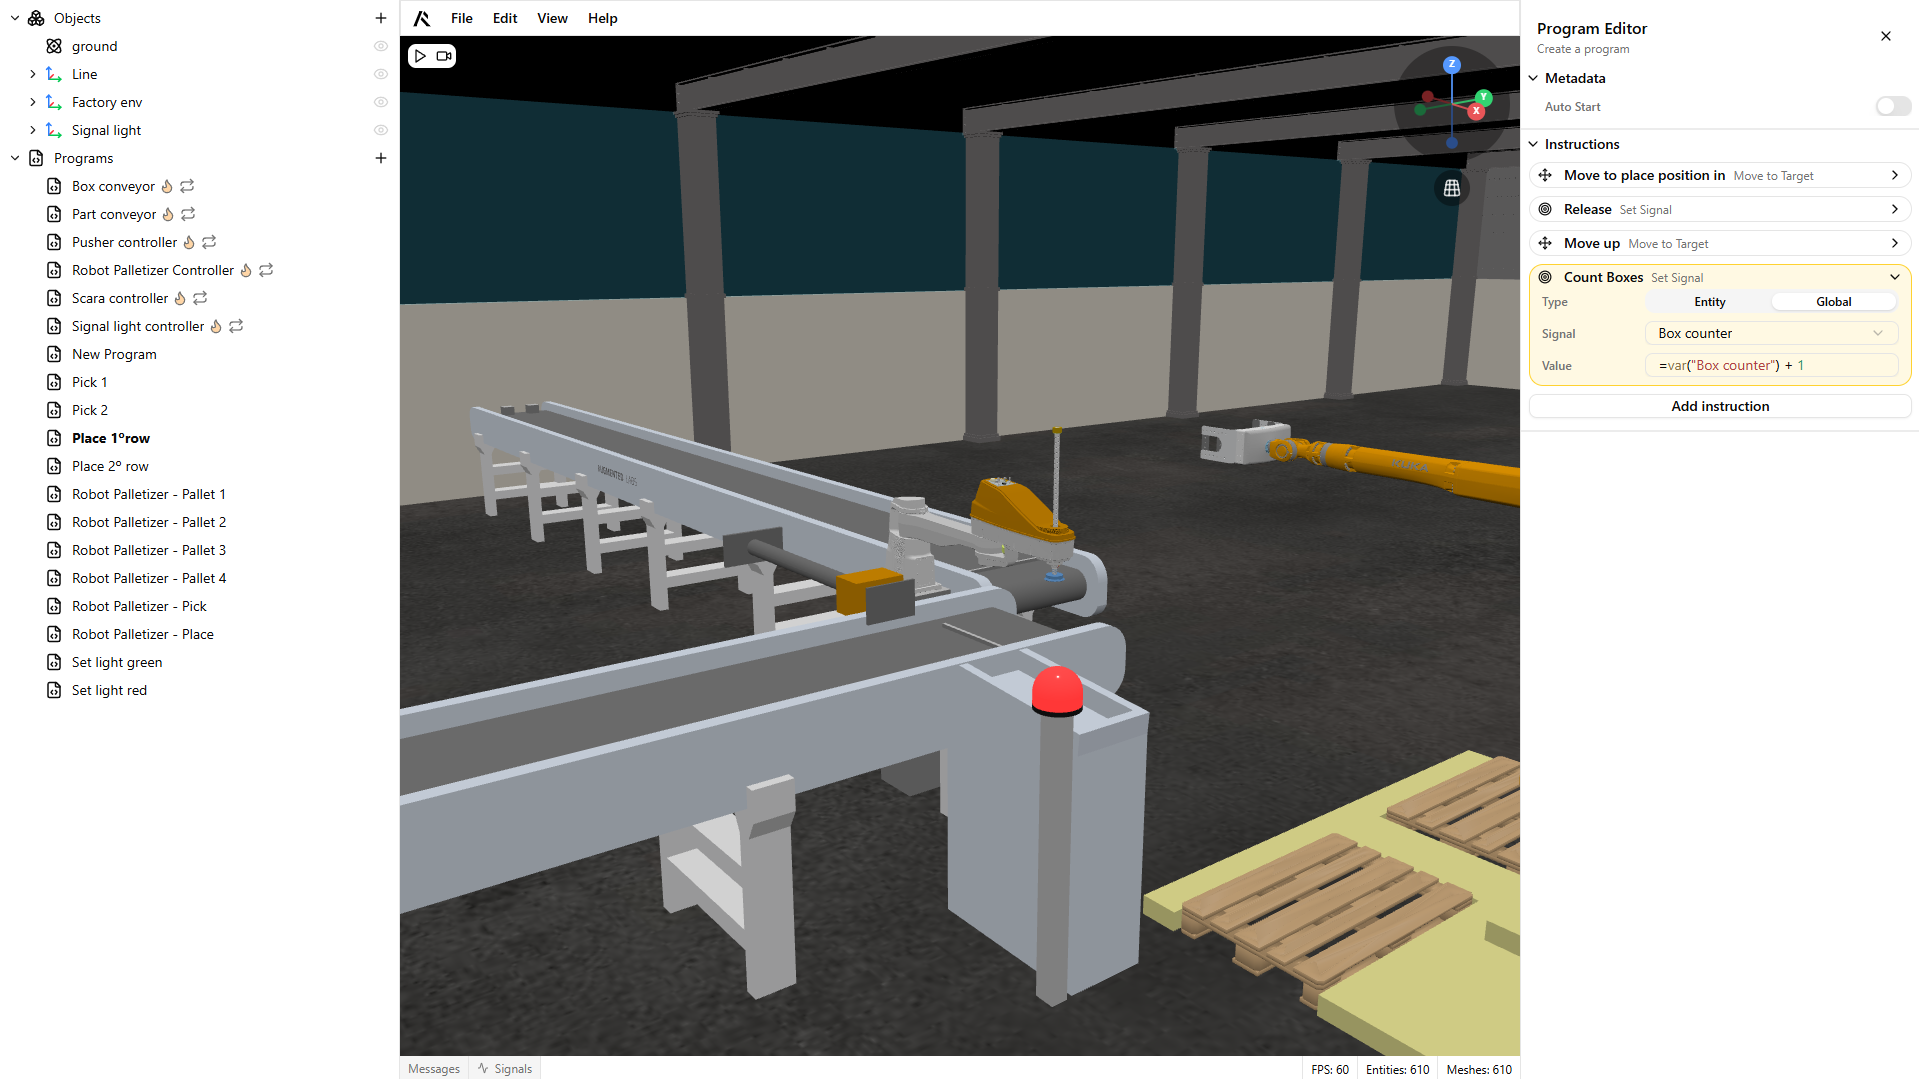
Numeric expressions
We also added a lightweight way to use integer and float variables inside conditions and signal-based instructions, enabling more advanced logic without extra workarounds.
In instructions like Wait for Signal, Set Signal, and Wait, you can now reference numeric signal variables using:
=var("variable_name")
This lets you build richer conditions (e.g., thresholds, counters, timing values, dynamic parameters) and create more complex, realistic simulation behavior, while keeping programs readable and easy to maintain.
General scene viewport improvements
ROBOTICA Studio 1.4 brings a set of scene viewport upgrades that make it easier to analyze, debug, and navigate your simulations.
.png)
Simulation speed control
You can now speed up or slow down the simulation in real time. This is perfect for:
- fast-forwarding through uninteresting sections (e.g., long transfers or idle time),
- reviewing critical moments in slow motion to understand what’s causing collisions, timing issues, or unexpected behavior.
Pause at any moment
We also added a Pause button, allowing you to freeze the simulation instantly whenever you need to inspect a state, check positions, validate signals, or debug logic.
World gizmo + view toggle
To improve scene navigation, we introduced a world gizmo and an Orthographic / Perspective toggle, giving you better spatial awareness and faster control when positioning the camera, aligning objects, and inspecting layouts from consistent angles.
MQTT Connectivity (experimental)
ROBOTICA Studio 1.4 introduces MQTT Connectivity (experimental), opening the door for external systems to monitor and control simulations using the widely adopted MQTT publish/subscribe protocol. Just open the Settings panel, connect to your MQTT broker, and start subscribing to signal topics or publishing commands back into the simulation.

Subscribe to simulation signals
Any entity that exposes a signal (for example, a sensor output) can now be mapped to an MQTT topic. External applications can subscribe to these topics to receive cyclic updates about simulation state, making it easy to stream what’s happening in Studio into dashboards, scripts, or control logic.
Publish commands back into the simulation
MQTT also works the other way around: you can publish to input topics (for example, a conveyor “Run” command) and control components from an external application, e.g., triggering actions, changing states, and testing sequences dynamically.
Why we’re shipping it now
This feature is still experimental, but we’re releasing it early to unlock more creative and powerful integrations—especially scenarios where a PLC or external controller subscribes to simulated signals and publishes commands back into the scene.
In this first stage, you may notice timing variations depending on network conditions and simulation speed. We’ll keep improving synchronization and reliability as we gather feedback from real-world use cases.